My malware analysis lab project
14.02.2026
This documentation outlines process of building an isolated malware analysis environment, using VirtualBox 7.2.4 virtualisation software, REMnux and Windows 10 VMs. Project is optimized for limited hardware resources.
Project was motivated by desire to learn malware analysis.
NOTE: This documentation does not focus on basic OS installation steps.
Hardware constraints
Virtual environment runs on an old laptop, with the following specifications:
- Intel Core i5 (9th gen)
- 8GB DDR4 RAM
- 500 GB SSD harddrive space
Due to limited 8GB RAM, I decided to change Windows Host OS to conserve resources. I used lightweight Debian 13 installation to maximize available memory for the VMs. Additionally, since I mainly want to focus on Windows native malware, using Linux Host OS provides a security layer in case of rare VM escape exploits.
Network topology plan
Environment for malware analysis needed to be isolated from my home LAN and Host OS. Some kinds of malware (e.g., worms) can infect devices accros network, so it's good to minimize that risk using proper isolation. Furthermore, no internet connection should be allowed in the environment. I decided to choose VirtualBox Internal Network for both Windows 10 VM and REMnux VM.
Bridged and NAT are unsafe, since those configurations allow internet access. Host-Only was also discarded. Even if Host-Only does not provide internet access, it creates virtual interface on host that increase risk of spreading malware to home LAN.
I decided to use a /30 subnet (255.255.255.252), to create strict point-to-point link between Windows 10 VM and REMnux VM. Topology is shown on the diagram down below.

Topology breakdown
- 10.0.0.4/30 - Internal Network address,
- 10.0.0.5 - Windows 10 VM,
- 10.0.0.6 - REMnux VM,
- 192.168.1.0/24 - home LAN, isolated from 10.0.0.4 Internal Network,
- 192.168.1.x - physical host that runs VirtualBox.
Windows 10 VM
On this machine, malware will be detonated. I decided to use FlareVM which contains pre-installed tools used in static and dynamic analysis.
Following resources were assigned to VM:
- 4 vCPU,
- 4GB RAM,
- 85GB Storage.
- Shared folders,
- Shared clipboard,
- Audio/Webcam
FlareVM installation process
FlareVM was installed via PowerShell. I relied on official FlareVM documentation, which can be found [HERE].
(New-Object net.webclient).DownloadFile('https://raw.githubusercontent.com/mandiant/flare-vm/main/install.ps1',"$([Environment]::GetFolderPath("Desktop"))\install.ps1")
Unblock-File .\install.ps1
Set-ExecutionPolicy Unrestricted -Force
.\install.ps1
FlareVM installation took about 4-5 hours in total. After installation I switched from NAT to Internal Network. I assigned following IPv4 address information to this machine:
- IPv4 Address: 10.0.0.5,
- Subnet mask: 255.255.255.252,
- Default gateway: 10.0.0.6 (pointing to REMnux),
- DNS server: 10.0.0.6 (pointing to REMnux).
After finishing configuration, I took clean snapshot that allow me to quick restore after malware detonation.
REMnux VM
REMnux is Ubuntu based Linux distribution that contain tools, such as INetSim, dedicated to handle HTTP, DNS requests that are being sent by malware to remote server.
Easiest way to install REMnux is by using ready to go VM that can be found [HERE]. The only change I made to REMnux VM is that I changed 4GB RAM to 2GB RAM due to host constraints.
REMnux VM IPv4 address configuration
After importing REMnux VM, interface was configured with a static IP address (10.0.0.6/30) and DHCP was disabled. It is done by modifying file/etc/netplan/50-cloud-init.yaml. Image below shows this.
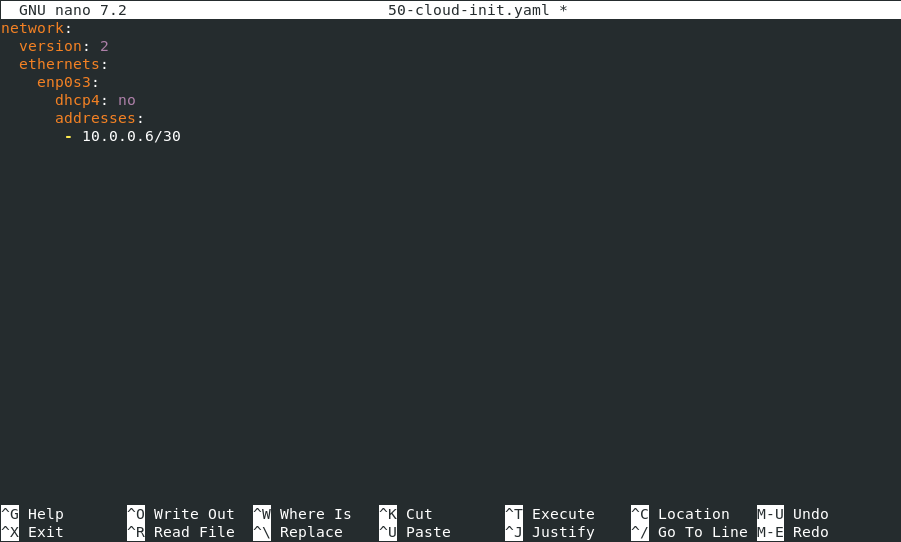
After modifying file, typesudo netplan applyto apply changes.
INetSim configuration
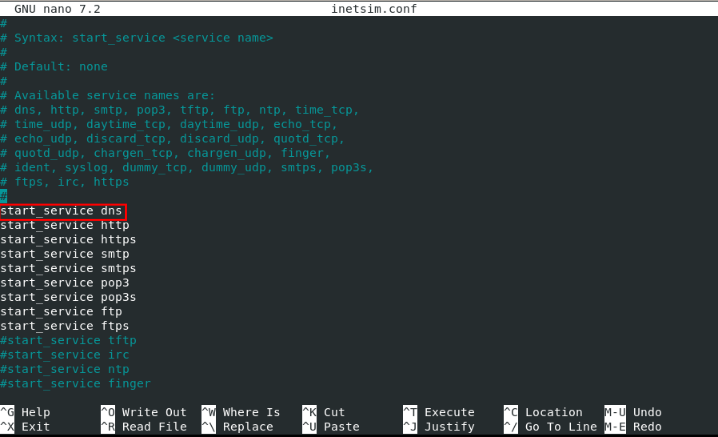
Next step is to configure INetSim. It was done by modifying/etc/inetsim/inetsim.conffile.
DNS service is enabled by uncommenting thestart_service_dnsdirective, as follows
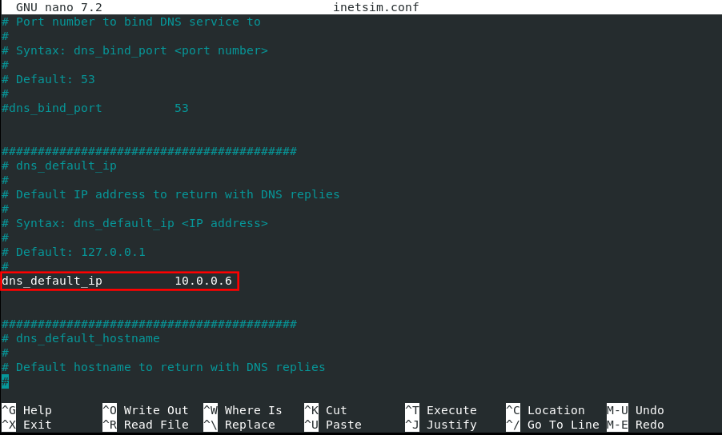
After enabling DNS service, I changeddns_default_ipto 10.0.0.6, which is REMnux IPv4 address.
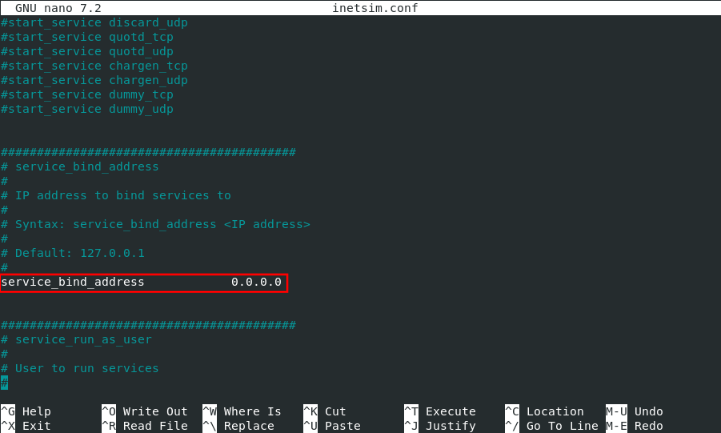
Finally, I setservice_bind_addressto 0.0.0.0 for REMnux to listen on all interfaces, as shown below.
To prevent port conflicts, on port 53 (DNS), I disabled the default system resolver, since REMnux won't be connecting to internet services and system resolver can interfere with INetSim.
sudo systemctl stop systemd-resolved.service
sudo systemctl disable systemd-resolved.service
sudo systemctl mask systemd-resolved.service
Troubleshooting: INetSim DNS Failure
During the initial run, the DNS service failed to start with a Perl error related toNet:DNS.
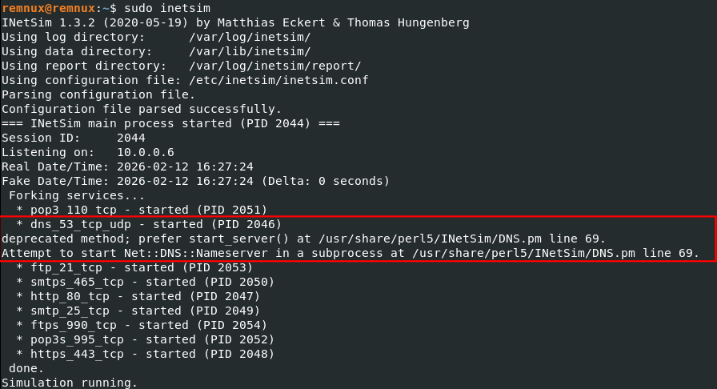
This error is caused by incompatibility between the installed version of theNet:DNSPerl module and the INetSim codebase.
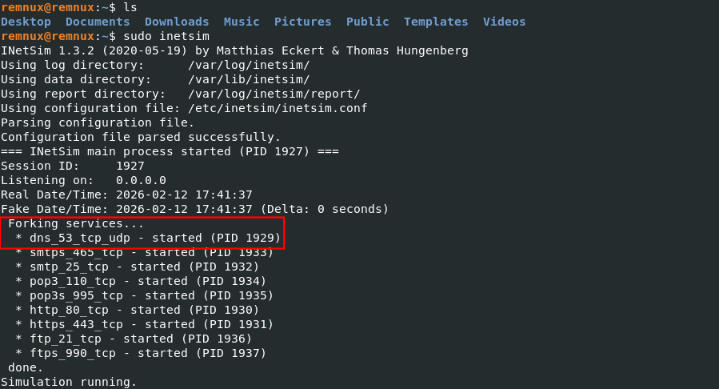
To solve this problem I manually downgraded library usingcpantool.
sudo cpan
force get NLNETLABS/Net-DNS-1.37.tar.gz
install NLNETLABS/Net-DNS-1.37.tar.gz
After doing so, service started successfully, as shown in screenshot below.
Connection test
To verify isolation and simulation accuracy, I did following test:
- Start INetSim service on REMnux VM (10.0.0.6),
- Start Wireshark capturing traffic on Windows 10 VM (10.0.0.5)
- Simple
nslookup google.comexecuted on Windows 10 VM
Results are shown in the screenshot below.

The DNS request for google.com was successfully intercepted and answered by REMnux (10.0.0.6). Ping requests to external IPs (8.8.4.4, 1.1.1.1) received no response, confirming that the environment has no connection to outside network
That confirms that any traffic generated by malware, will be routed to and captured by the REMnux gateway.